Like most people at my company, I use Outlook Calendar to remind myself and everyone else (who cares to know) when I am and am not available. Outlook Calendar is an invaluable tool if you’re in the habit of checking if someone is available first before you call them or send them a meeting invite.
What are the basics of Outlook Calendar? What do you need to know to show if you’re free during that task reminder or busy during that two-hour webinar? Can you add your own reminders for personal events? If I can do it – so can you!
Let’s look at your calendar
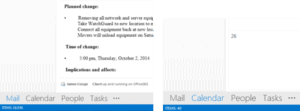
To view your own calendar, open up Outlook and click Calendar on the taskbar at the bottom of the page.
Once clicked, the screen will shift to the default monthly calendar view.
Add an event
To add an event to your calendar, you can
[list style=”bullet”][li]Double-click on the Calendar. For example, double-clicking on Monday will automatically create an event for that day.[/li][li]On the Ribbon, click on New Appointment.[/li][/list]
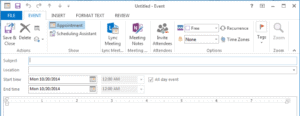
You’ll now have a new window to create the appointment.
You can…
[list style=”bullet”][li]Add a Subject to describe the appointment[/li][li]Add a Location (is this a meeting room? Is it a call on the conference line?)[/li][li]Modify the Start time and End time, or mark it as an All day event (for example, for vacation days)[/li][li]At the top on the Ribbon, you can mark your status for this appointment (Busy, Out of the Office, Free, etc.). If you have Microsoft Lync integration, this is especially helpful.[/li][li]By default you’ll be reminded 15 minutes before the appointment, but you can change this.[/li][/list]
There are also some advanced features.
Inviting attendees
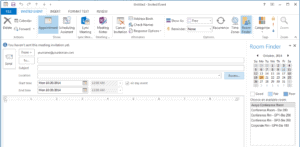
To invite other attendees, click on the Invite Attendees button on the ribbon.
This will add the To: line and bring up the Room Finder (this feature requires additional setup before you can use it). Simply type in email addresses for your attendees, and when done, click Send.
Creating recurring events
Do you have a company meeting the first Monday of every month? Need to submit your expense report every Friday at 3pm? Recurring events will keep you on track!
Click on the Recurrence button on the Ribbon. The Appointment Recurrence window will pop up.
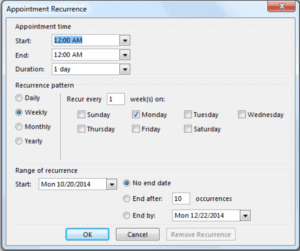
At the bottom of the window, you can set whether the event has an end date.
Time zones
In some cases, you may be setting up appointments with people who are in different time zones. It’s helpful to set the time zone on your appointment – if you do, it becomes clearer what the time really is (who wants to show up for a meeting an hour late because you forgot the other person was in Missouri and not New York like you?).
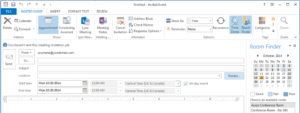
To do this, just click on Time Zones on the Ribbon. This adds the time zone fields next to Start time and End time.
Marking an appointment as private
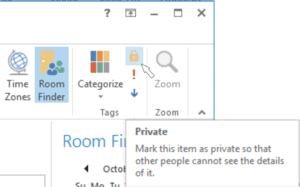
Depending on the default settings of your calendar, it’s possible that anyone viewing your calendar can see every appointment you have. But what if you want to add some private events? It is possible to show when you are busy or out of the office, but hide the name of the event.
To do this, go to the Tags group on the Ribbon while you’re creating an event. Click on the Lock icon.
Viewing someone else’s calendar
And last but not least, how do you view someone else’s calendar to view their events?
[list style=”number”][li]Go to File > Open & Export > Other User’s Folder.[/li][li]Find the person’s name and make sure Folder type is set to Calendar.[/li][li]Click OK.[/li][/list]


